Quick Start
This guide explains how a Super Admin can create and train a Knowledge Base on the Curatu admin panel. All screenshots are provided as visual examples to help guide your actions.
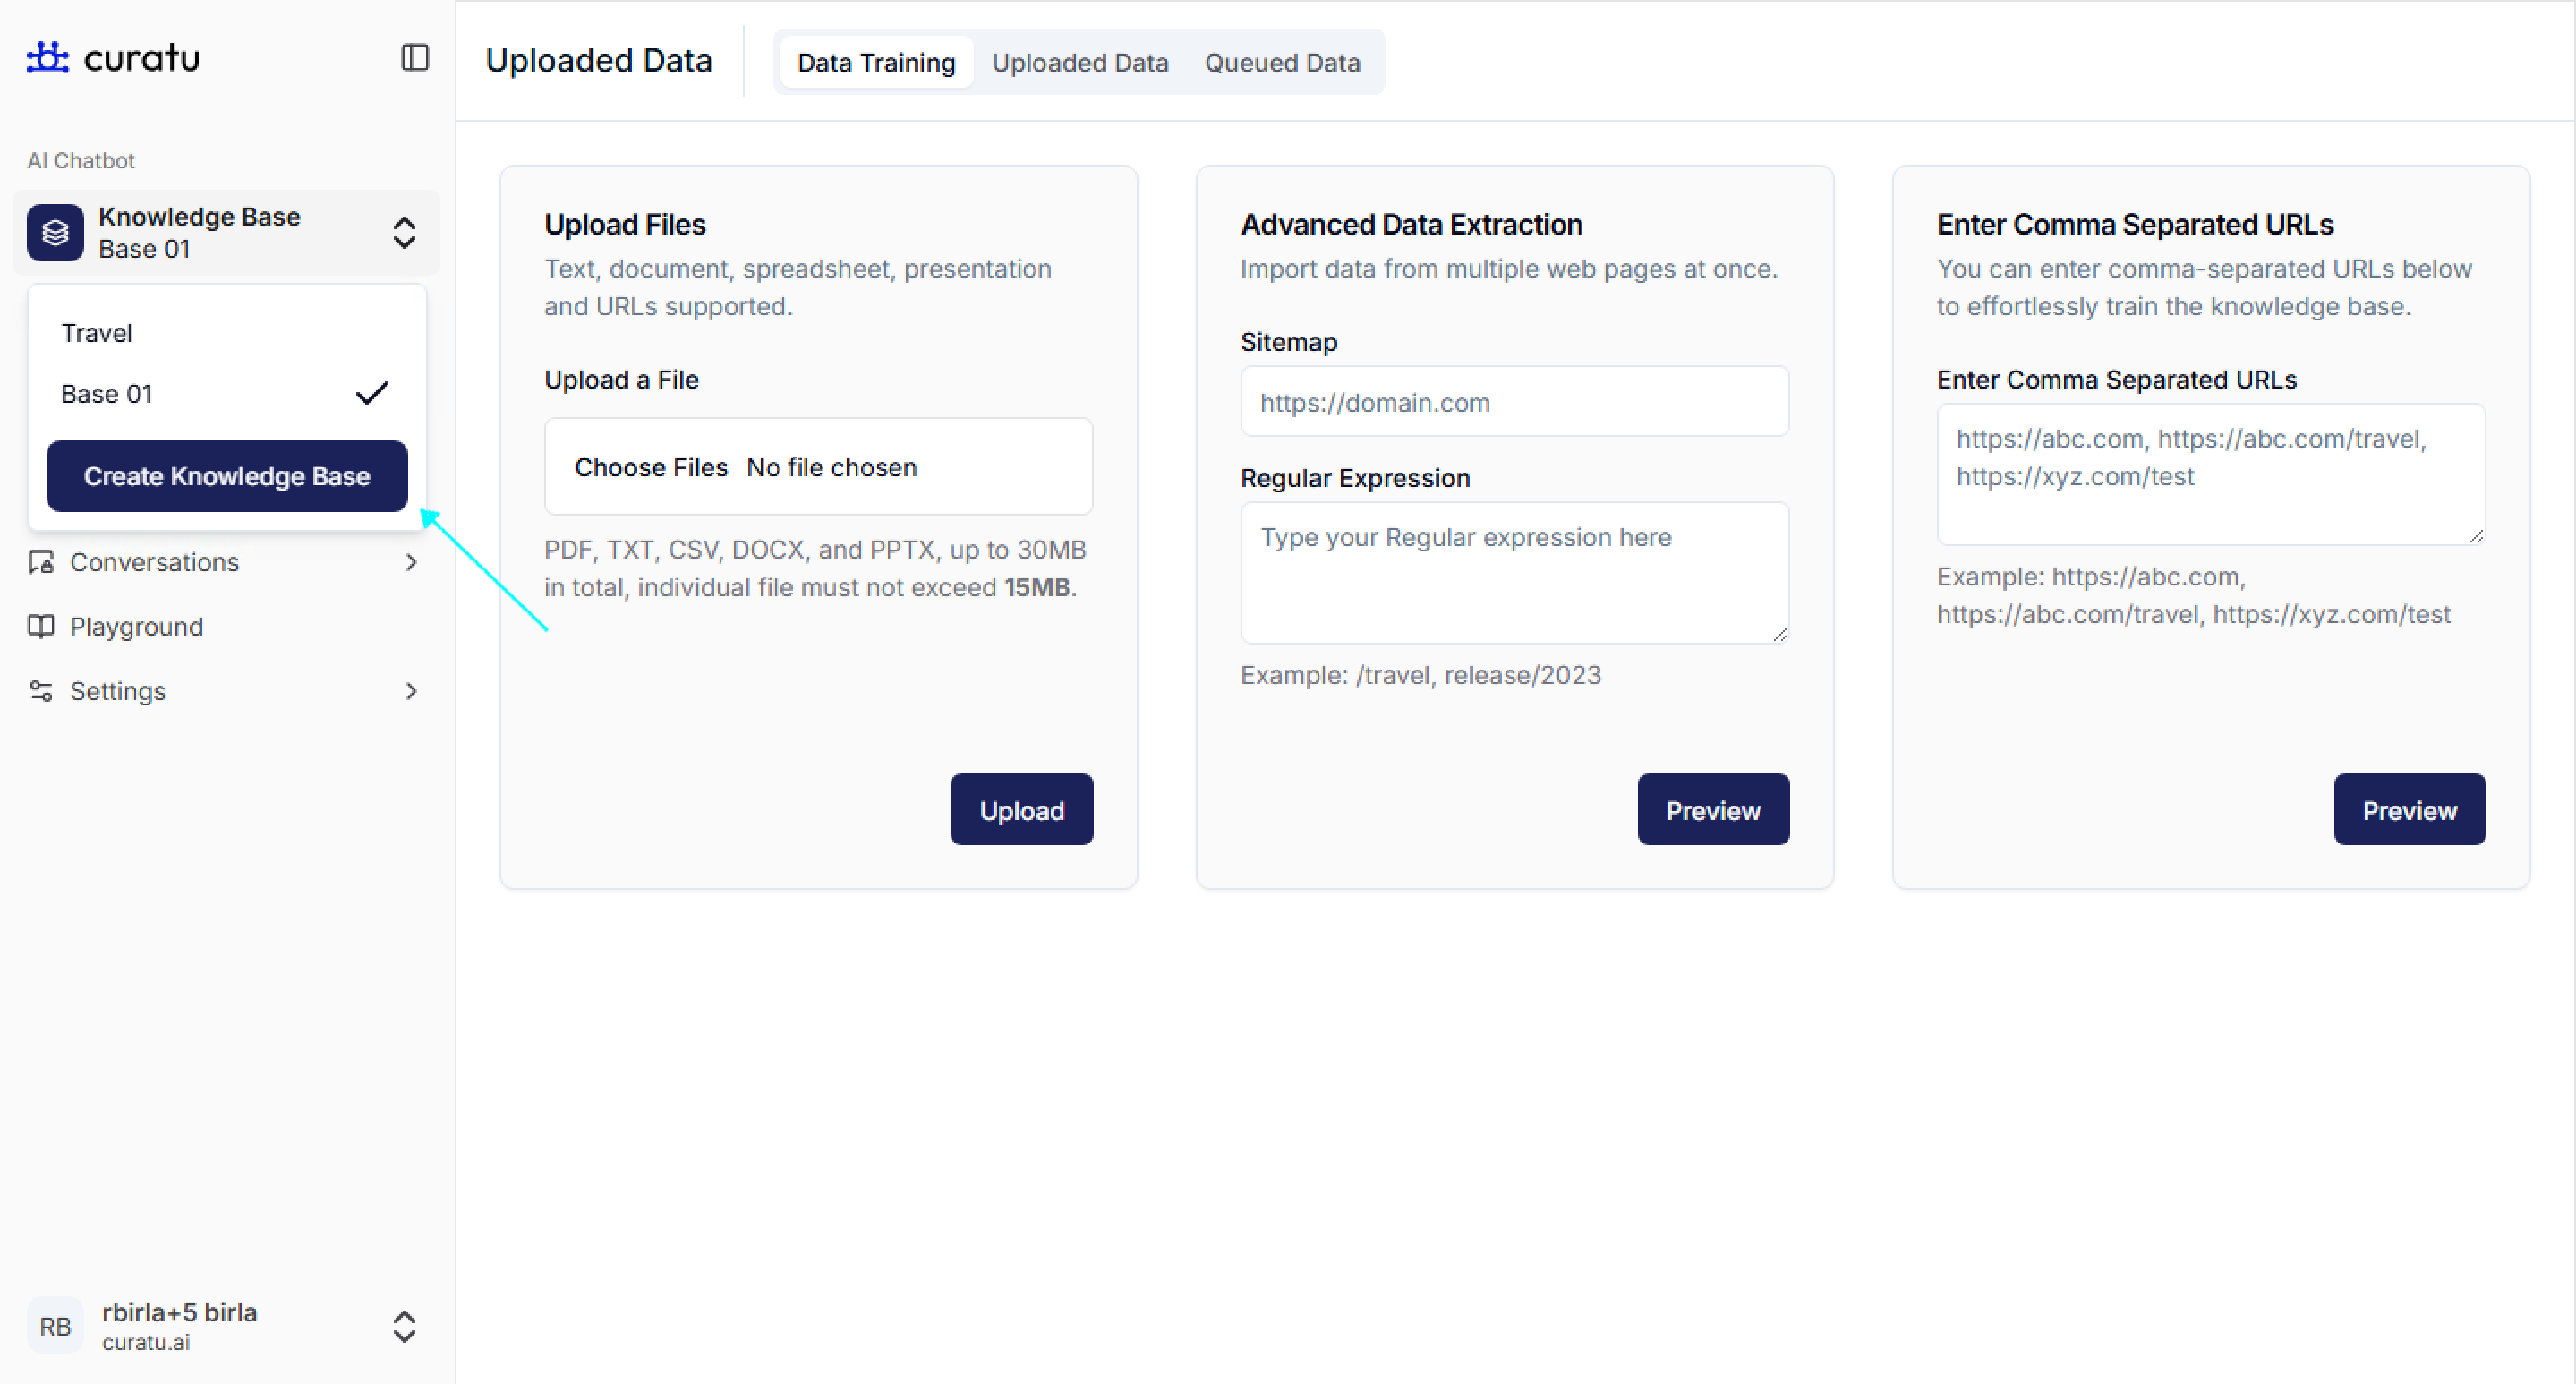
Step 1: Go to “Knowledge Base”
- In the left sidebar menu, under AI Chatbot, click on
Knowledge Base. - You will see a Create Knowledge Base button — click on it.
- Refer to the image as an example to see exactly where to click.
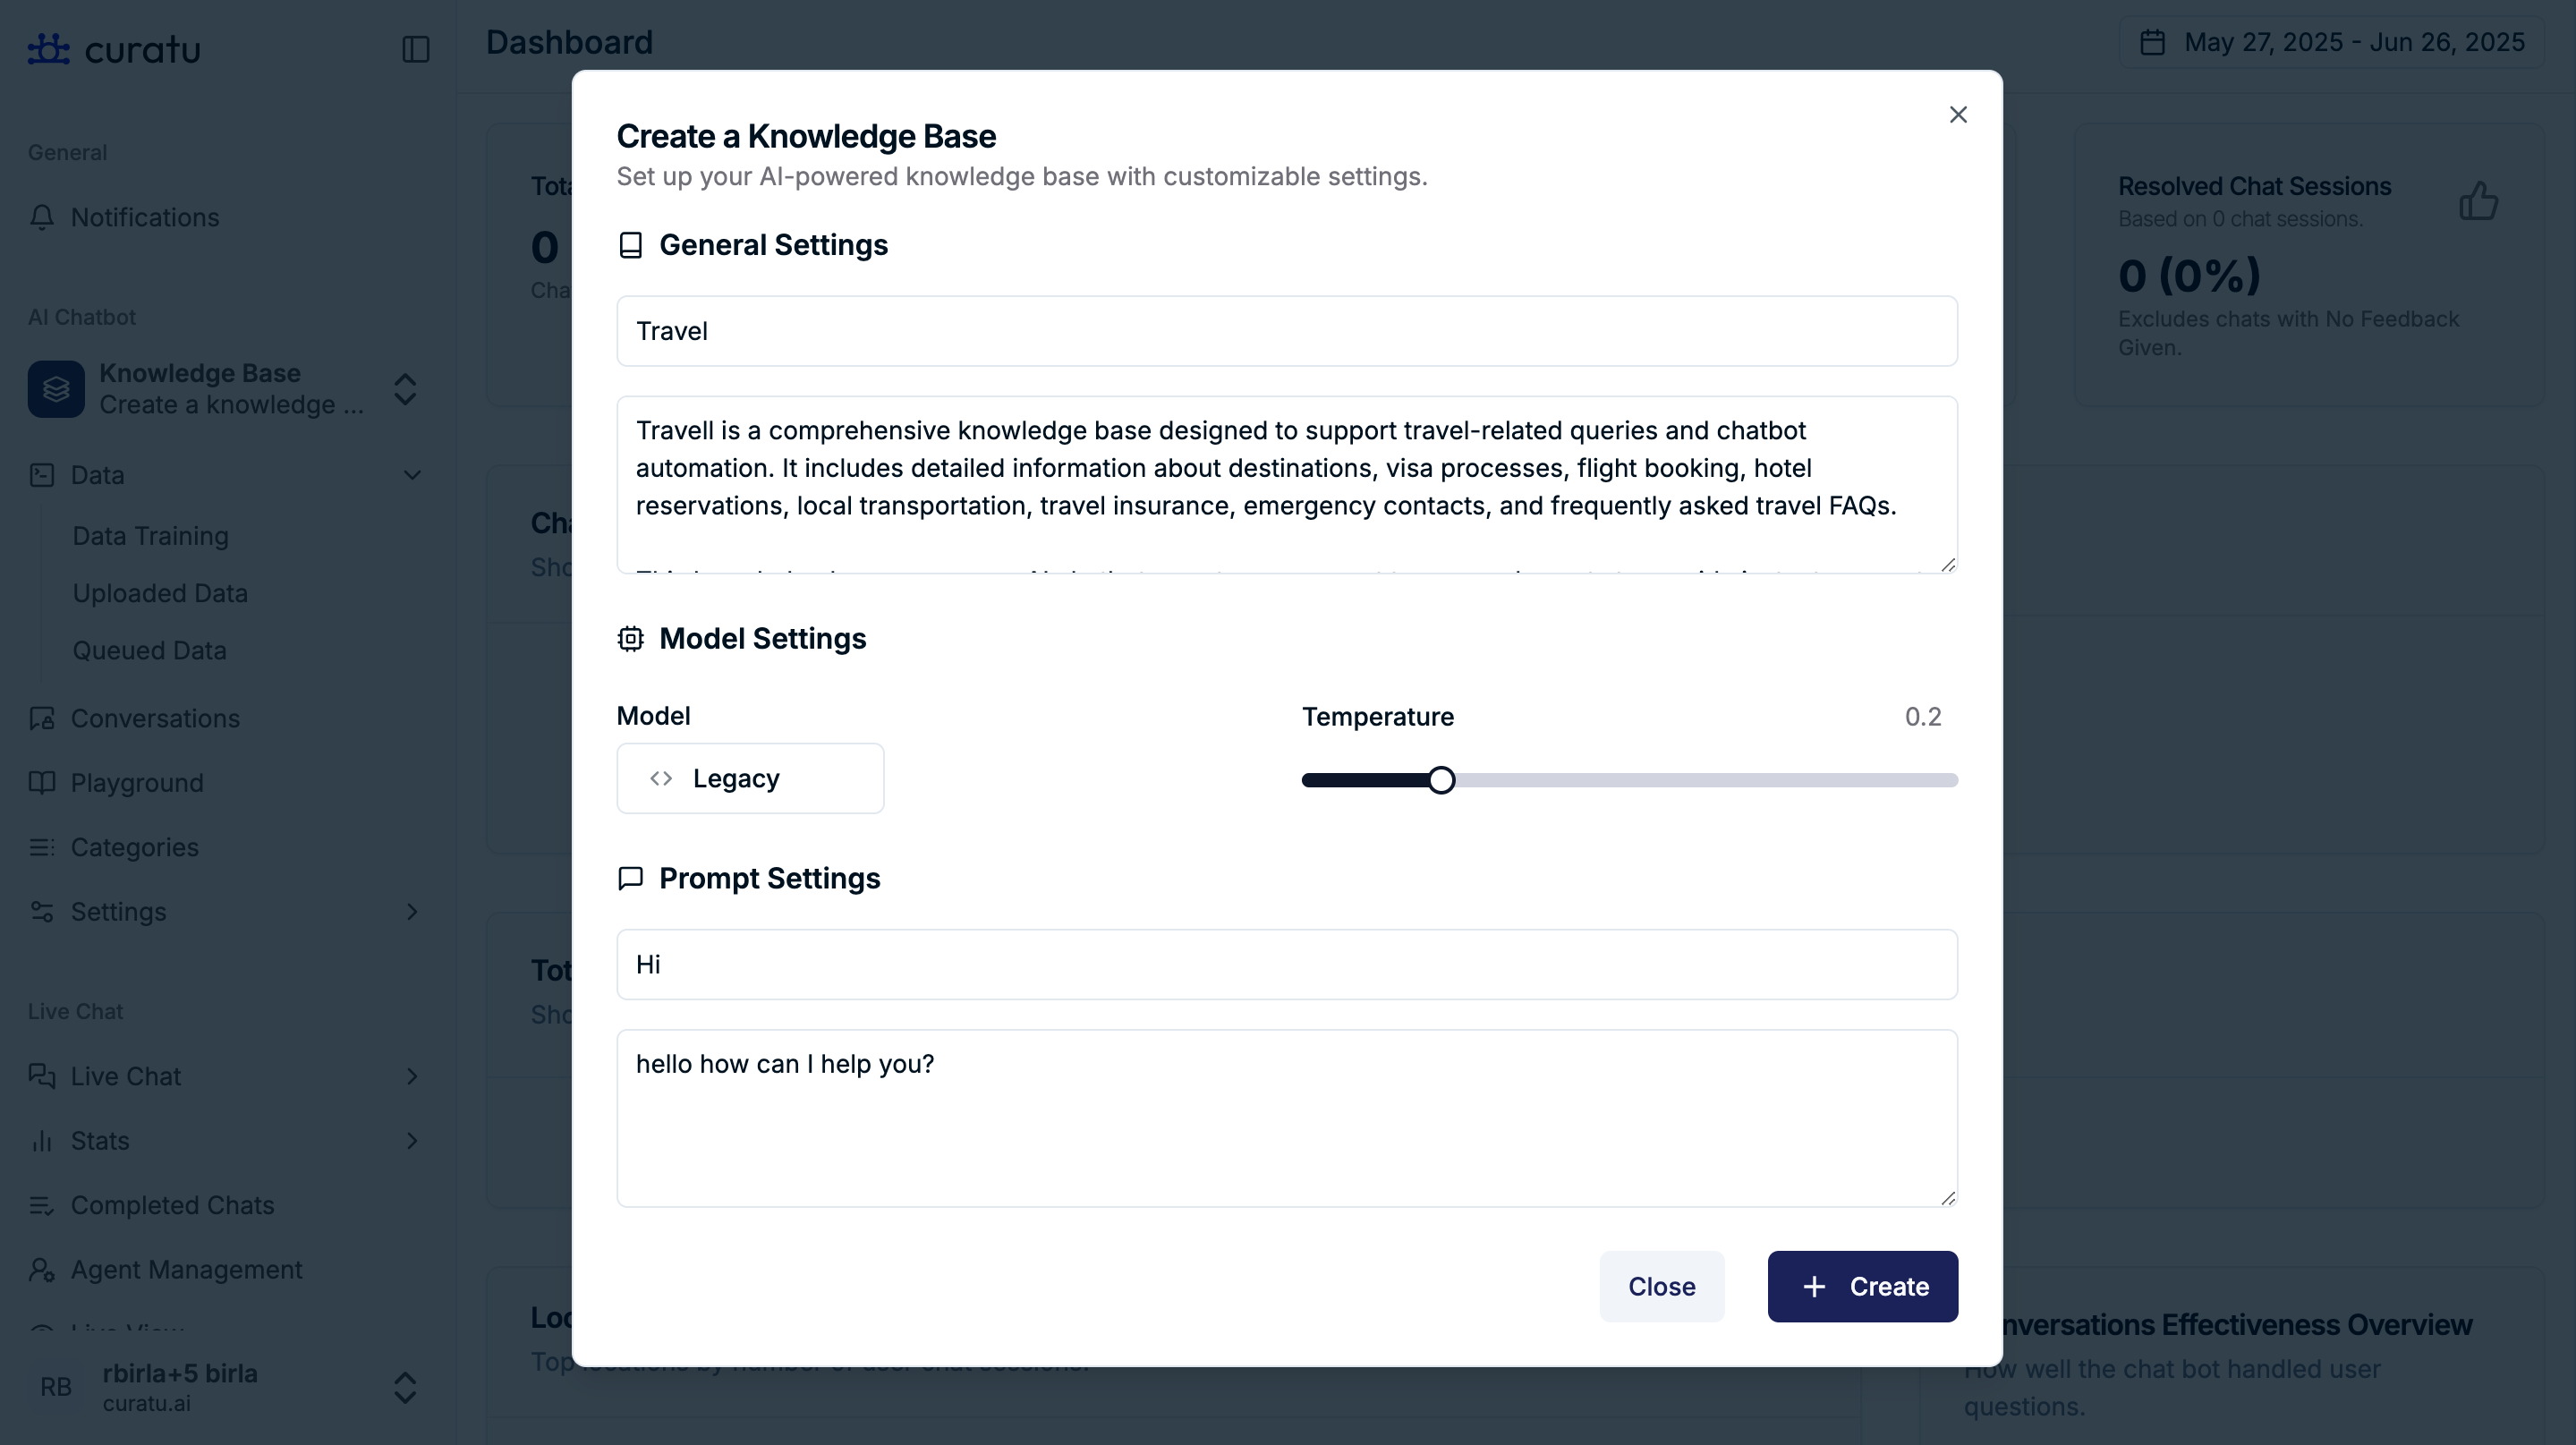
Step 2: Fill in Knowledge Base Details
Here, you can enter the information required to create a new knowledge base.
- Name: Enter a name of the knowledge base. Eg - Travel
- Description: Enter what this knowledge base is about. Eg - Travel is a comprehensive knowledge base designed to support travel-related queries and chatbot automation. It includes detailed information about destinations, visa processes, flight booking, hotel reservations, local transportation, travel insurance, emergency contacts, and frequently asked travel FAQs.
- Model: Select a model for training. Eg - Pro
- Temperature: Set the temperature value. The value should be between 0 and 1. Temperature controls how random or creative the model’s responses are.
Lower values make answers more focused and predictable, while higher values make them more varied and exploratory. Eg - 0.2
- When to use a lower temperature - Use it for tasks that need accuracy and consistency. Example: Asking the model to extract policy numbers from uploaded documents. The answer should not change each time.
- When to use a higher temperature - Use it for creative or exploratory tasks. Example: Asking the model to generate marketing taglines for a new product where variety is helpful.
- Prompt Settings: A prompt is the instruction you give the model so it understands what task to perform and how to perform it. Clear prompts can significantly improve the quality of the model’s responses, while unclear ones can reduce accuracy. If you don’t have any specific instructions, you can leave it blank.
- After filling out all fields, click on the Create button.
- Use the screenshot below as an example to guide where to input this data.
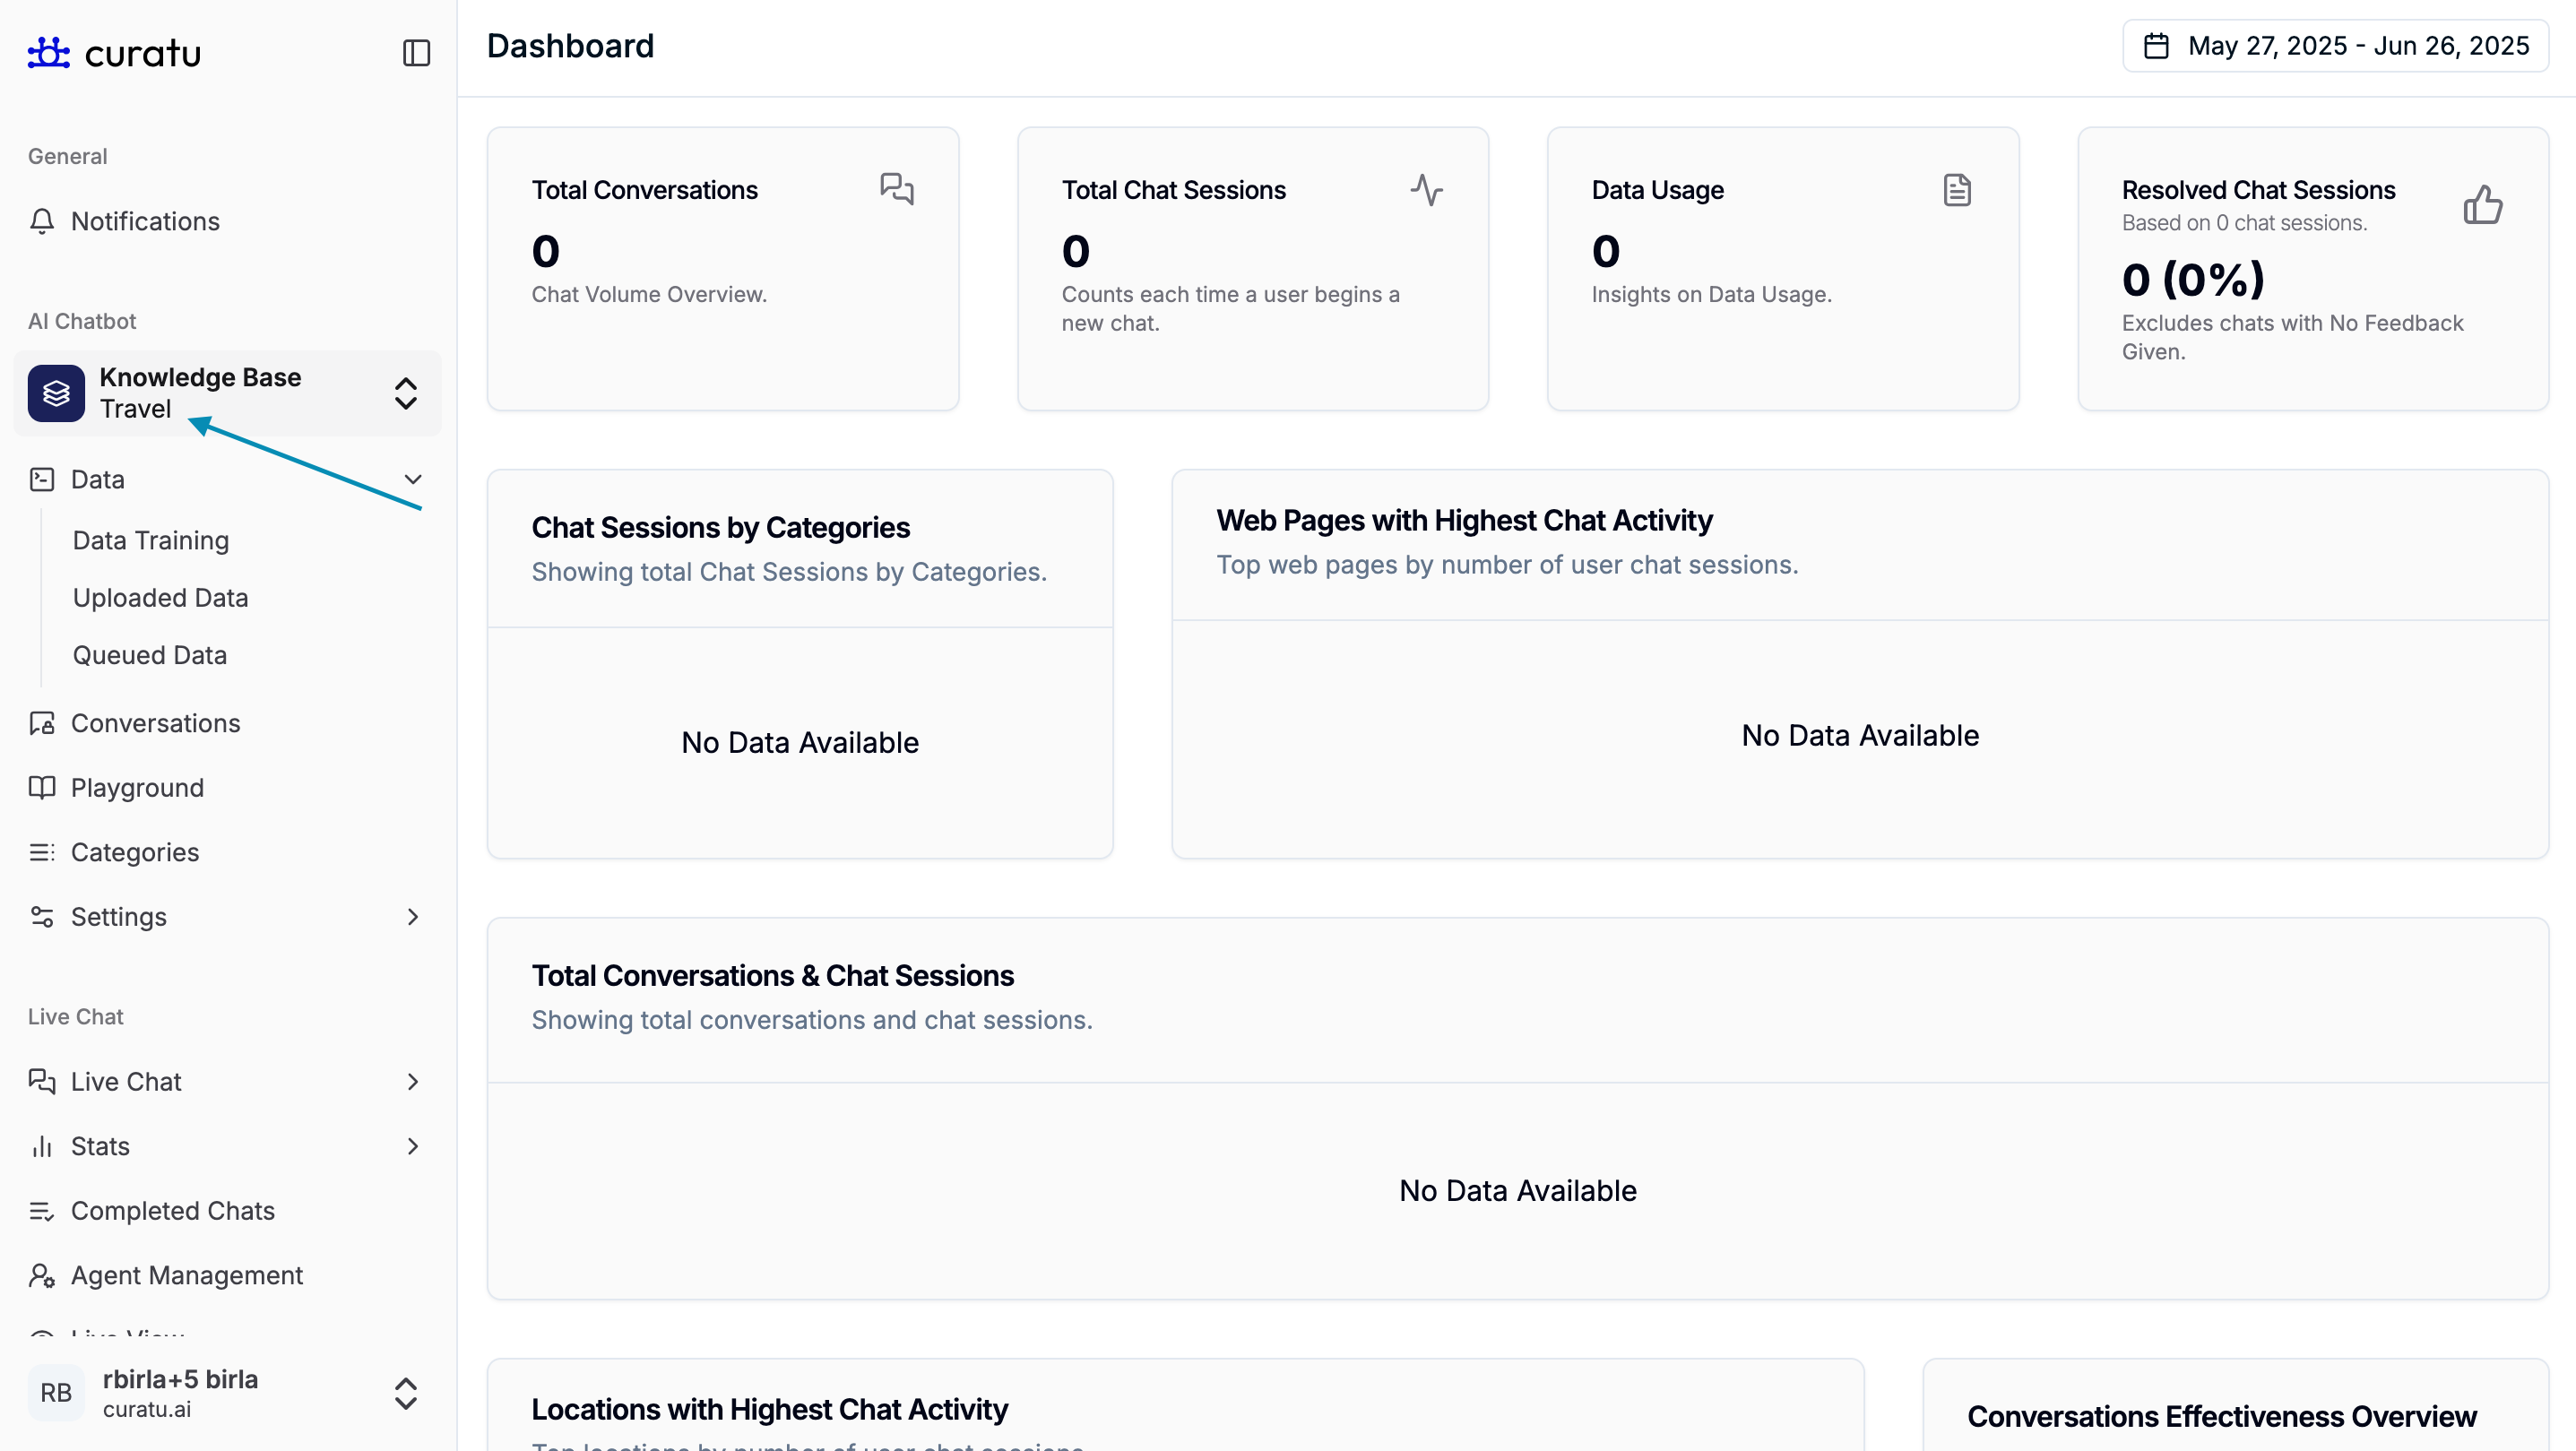
Step 3. Show Your Knowledge Base from Sidebar
After you create a knowledge base, you will see its name appear in the sidebar under the “Knowledge Base” section — as shown in the image below (indicated by the arrow).
Click on this name (e.g., Travel) to open its options such as Data Training, Uploaded Data, and Queued Data.
Step 4: Train the Knowledge Base
Once your knowledge base is created, you can train it with data using any of the following three options:
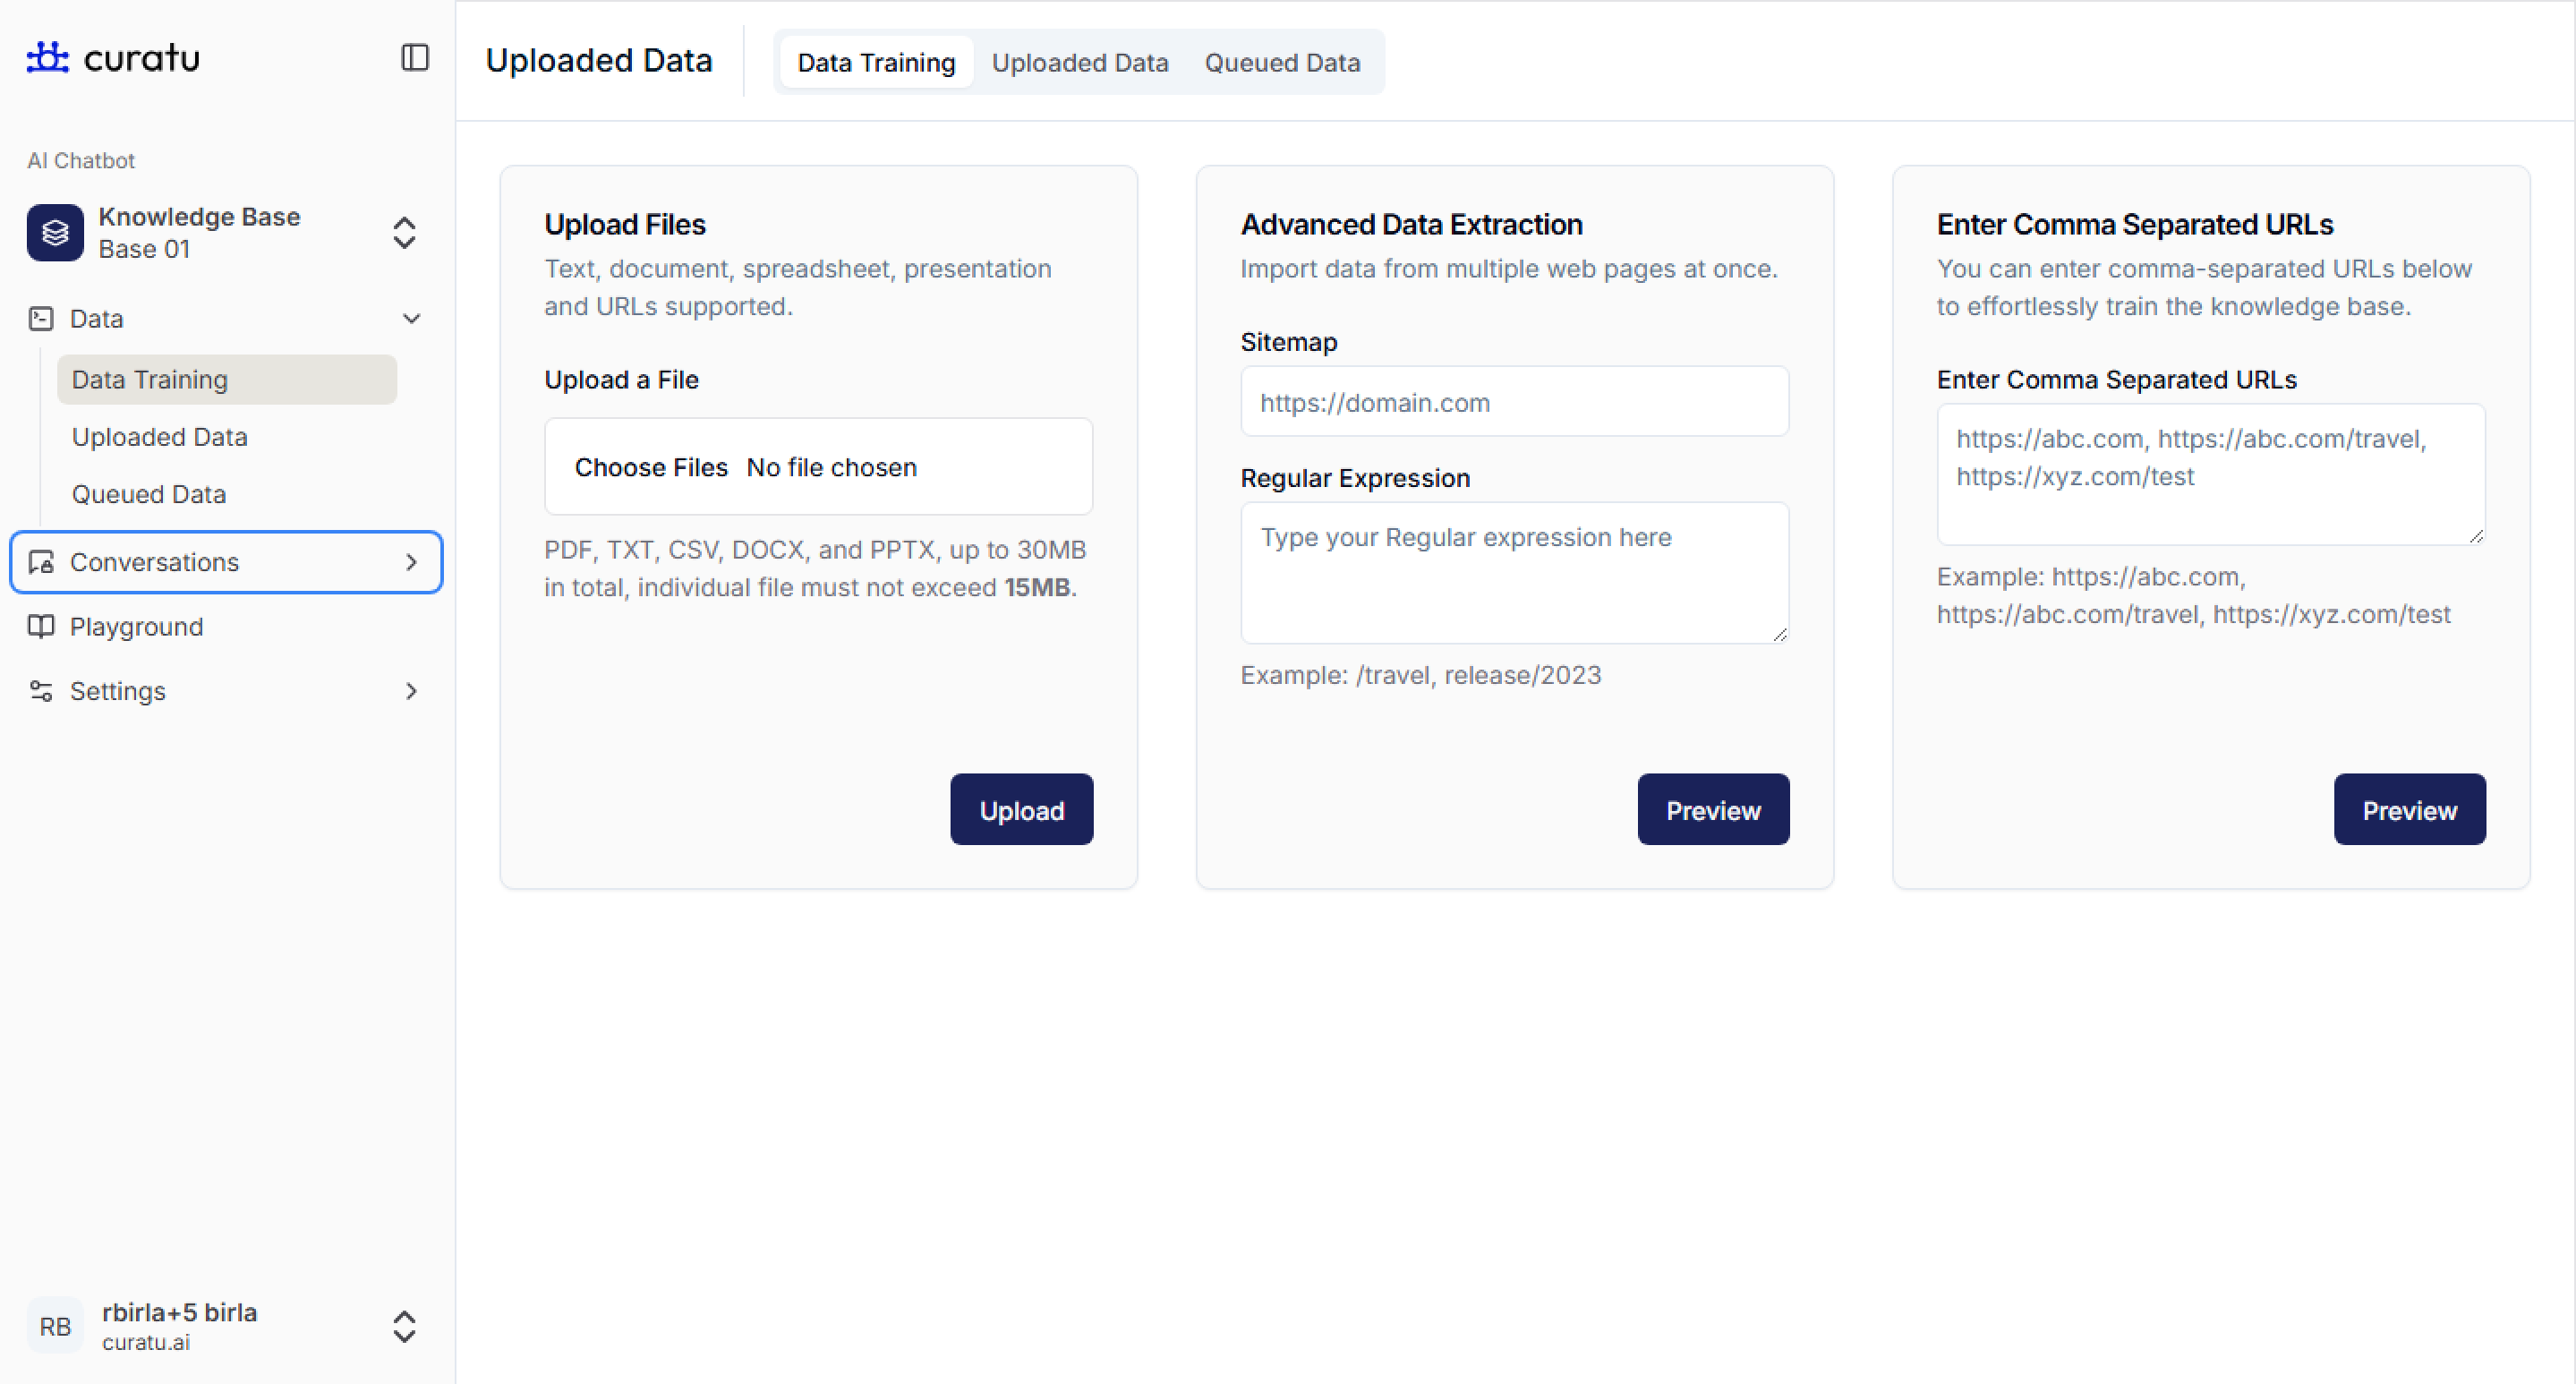
Option 1: Upload a File
- Go to:
Knowledge Base → Travel → Data → Data Training - Under Upload Files, click
Choose Files - Select your file (e.g.,
Travel_Knowledge_Base.pdf) - Click Upload
- Supported formats: PDF, TXT, CSV, DOCX, PPTX (max 30MB total, 15MB per file)
- See the image for reference on where to upload files.
Option 2: Enter URLs
- In the Enter Comma Separated URLs box, add one or more URLs separated by commas
- Example:
https://abc.com, https://xyz.com/travel - Click Preview to fetch data from the URLs before training
- Use when you want to pull live travel data from your website or blogs
Option 3: Advanced Data Extraction
- Use Sitemap + Regular Expression for bulk and filtered page extraction
- Add your site’s sitemap URL and regex to define which pages to extract
- Example:
- Sitemap:
https://example.com/sitemap.xml - Regex:
/travel, /destinations/.*
- Sitemap:
- Click Preview to see which pages will be used for training
Use the image as a visual guide for all three options shown under the Data Training tab.
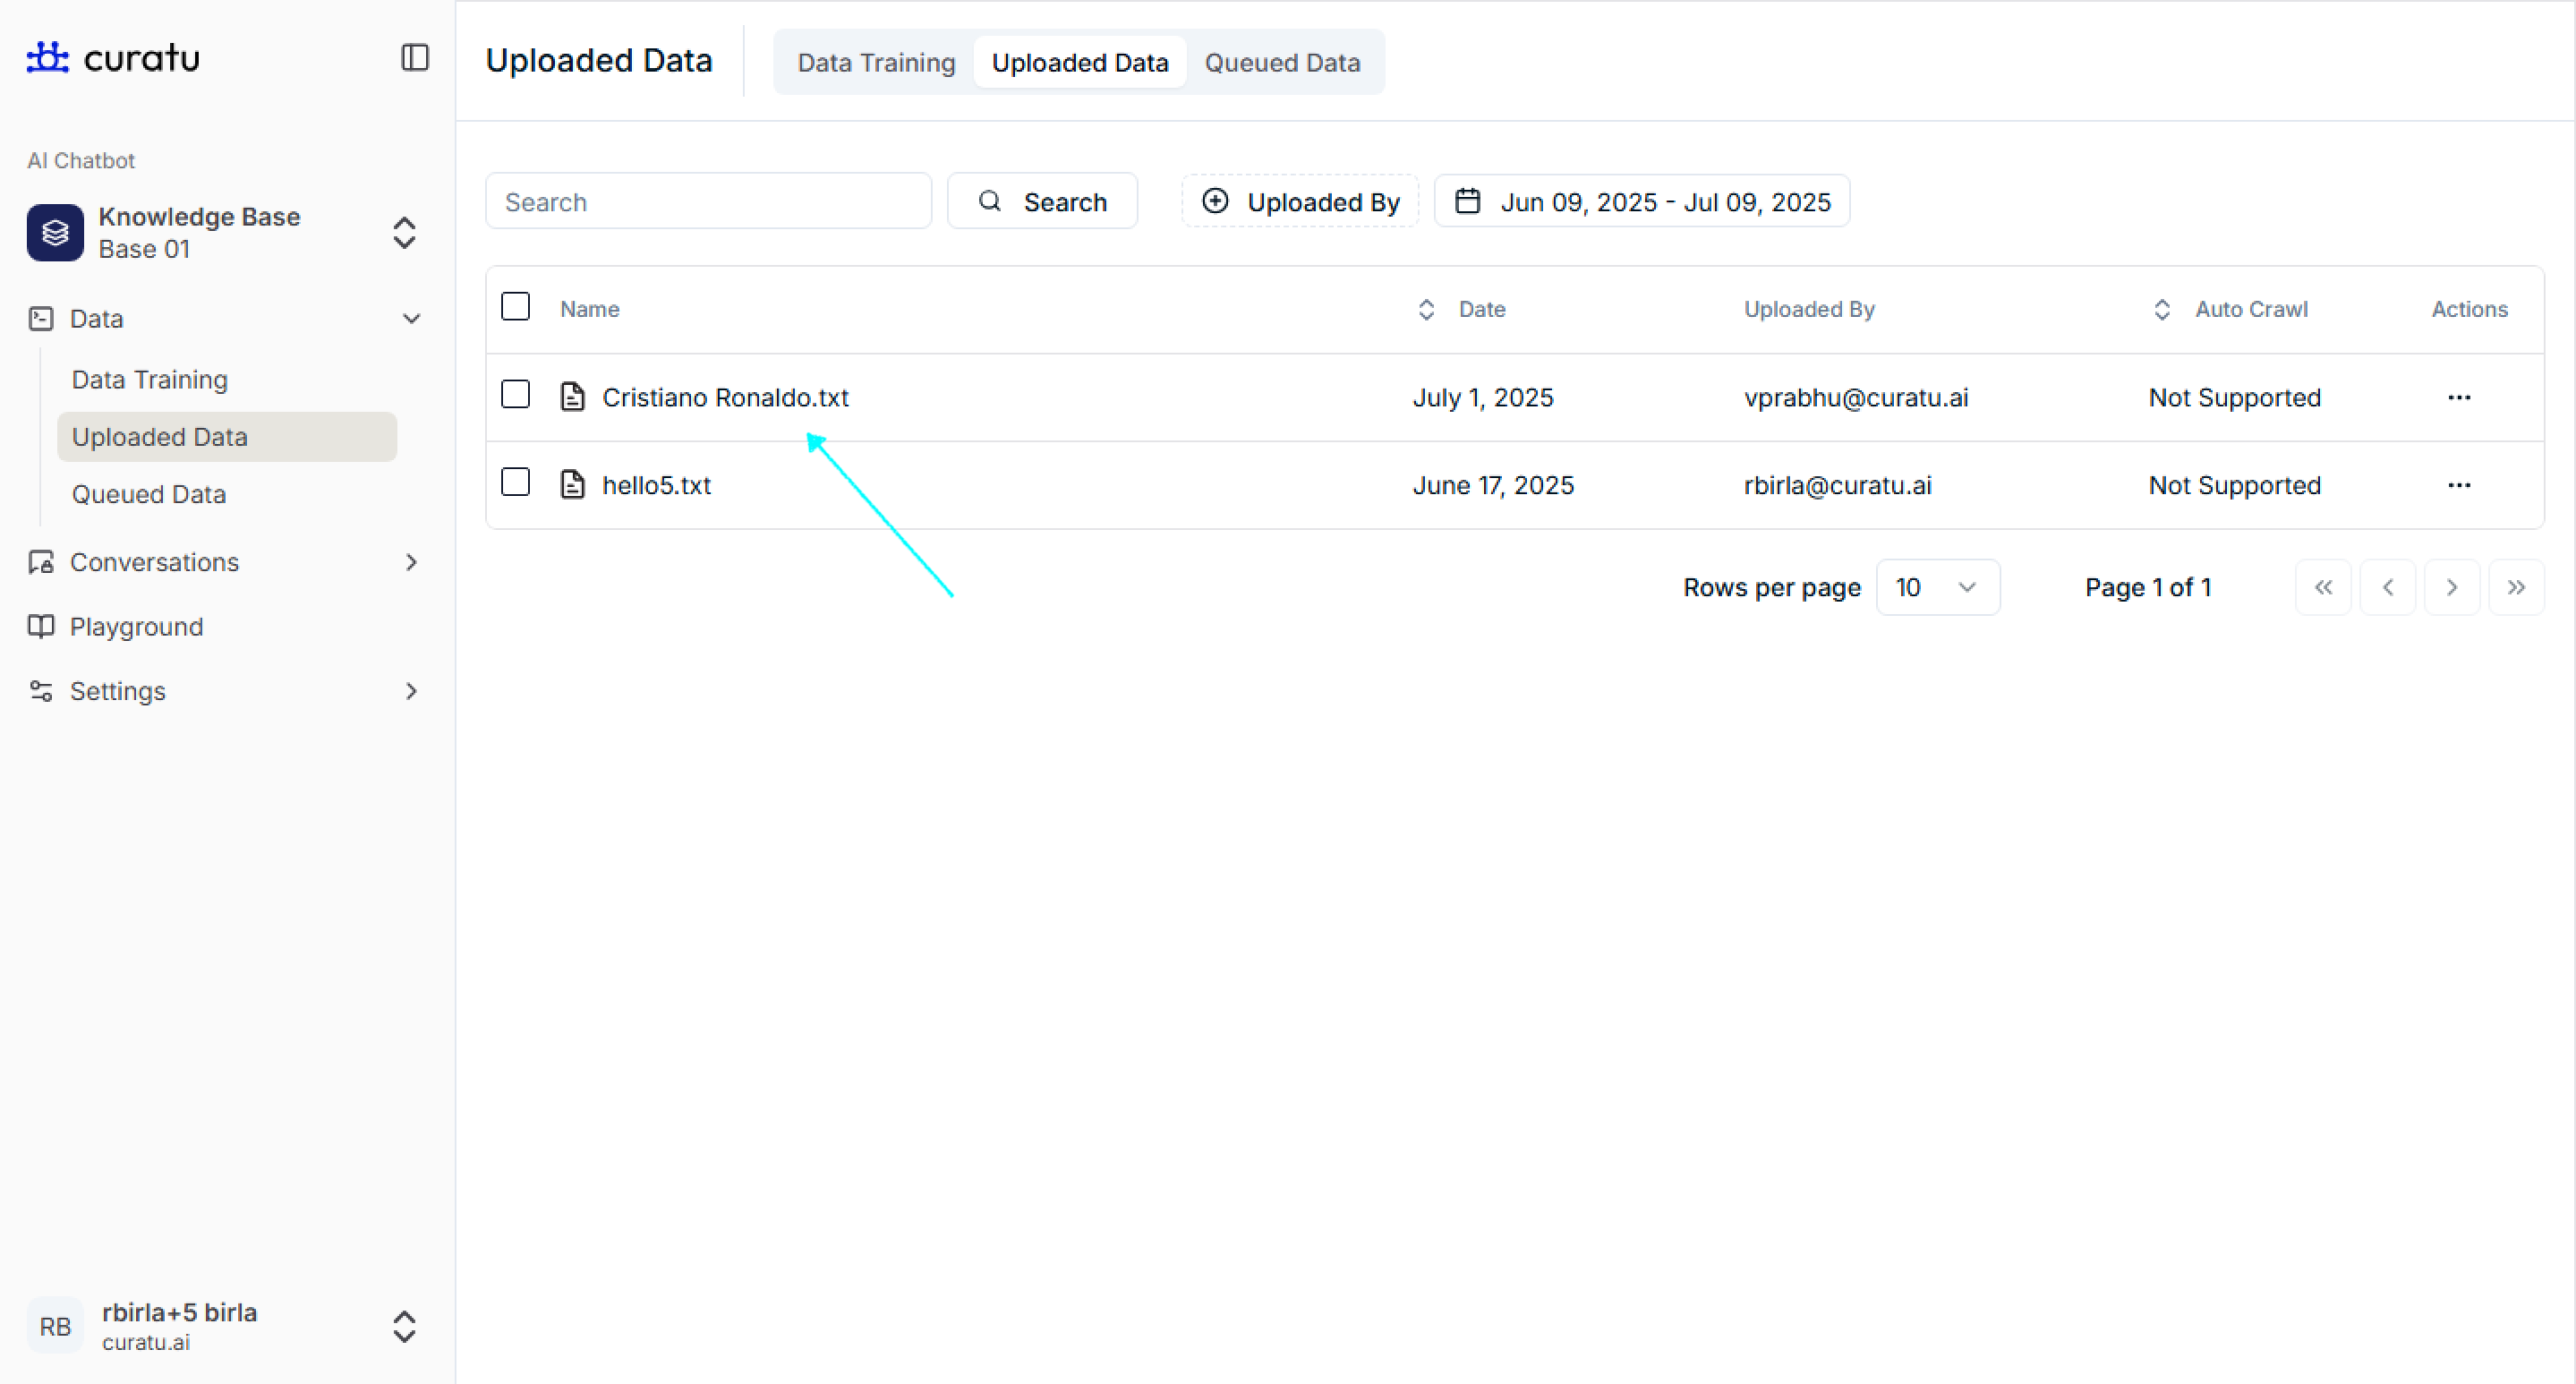
Step 5: Confirm File Upload
- Navigate to the
Uploaded Datatab underData - You should see
Travel_Knowledge_Base.pdflisted - This confirms your file has been successfully uploaded and is now available for training.
- Use the image to check where you will see your uploaded file listed.
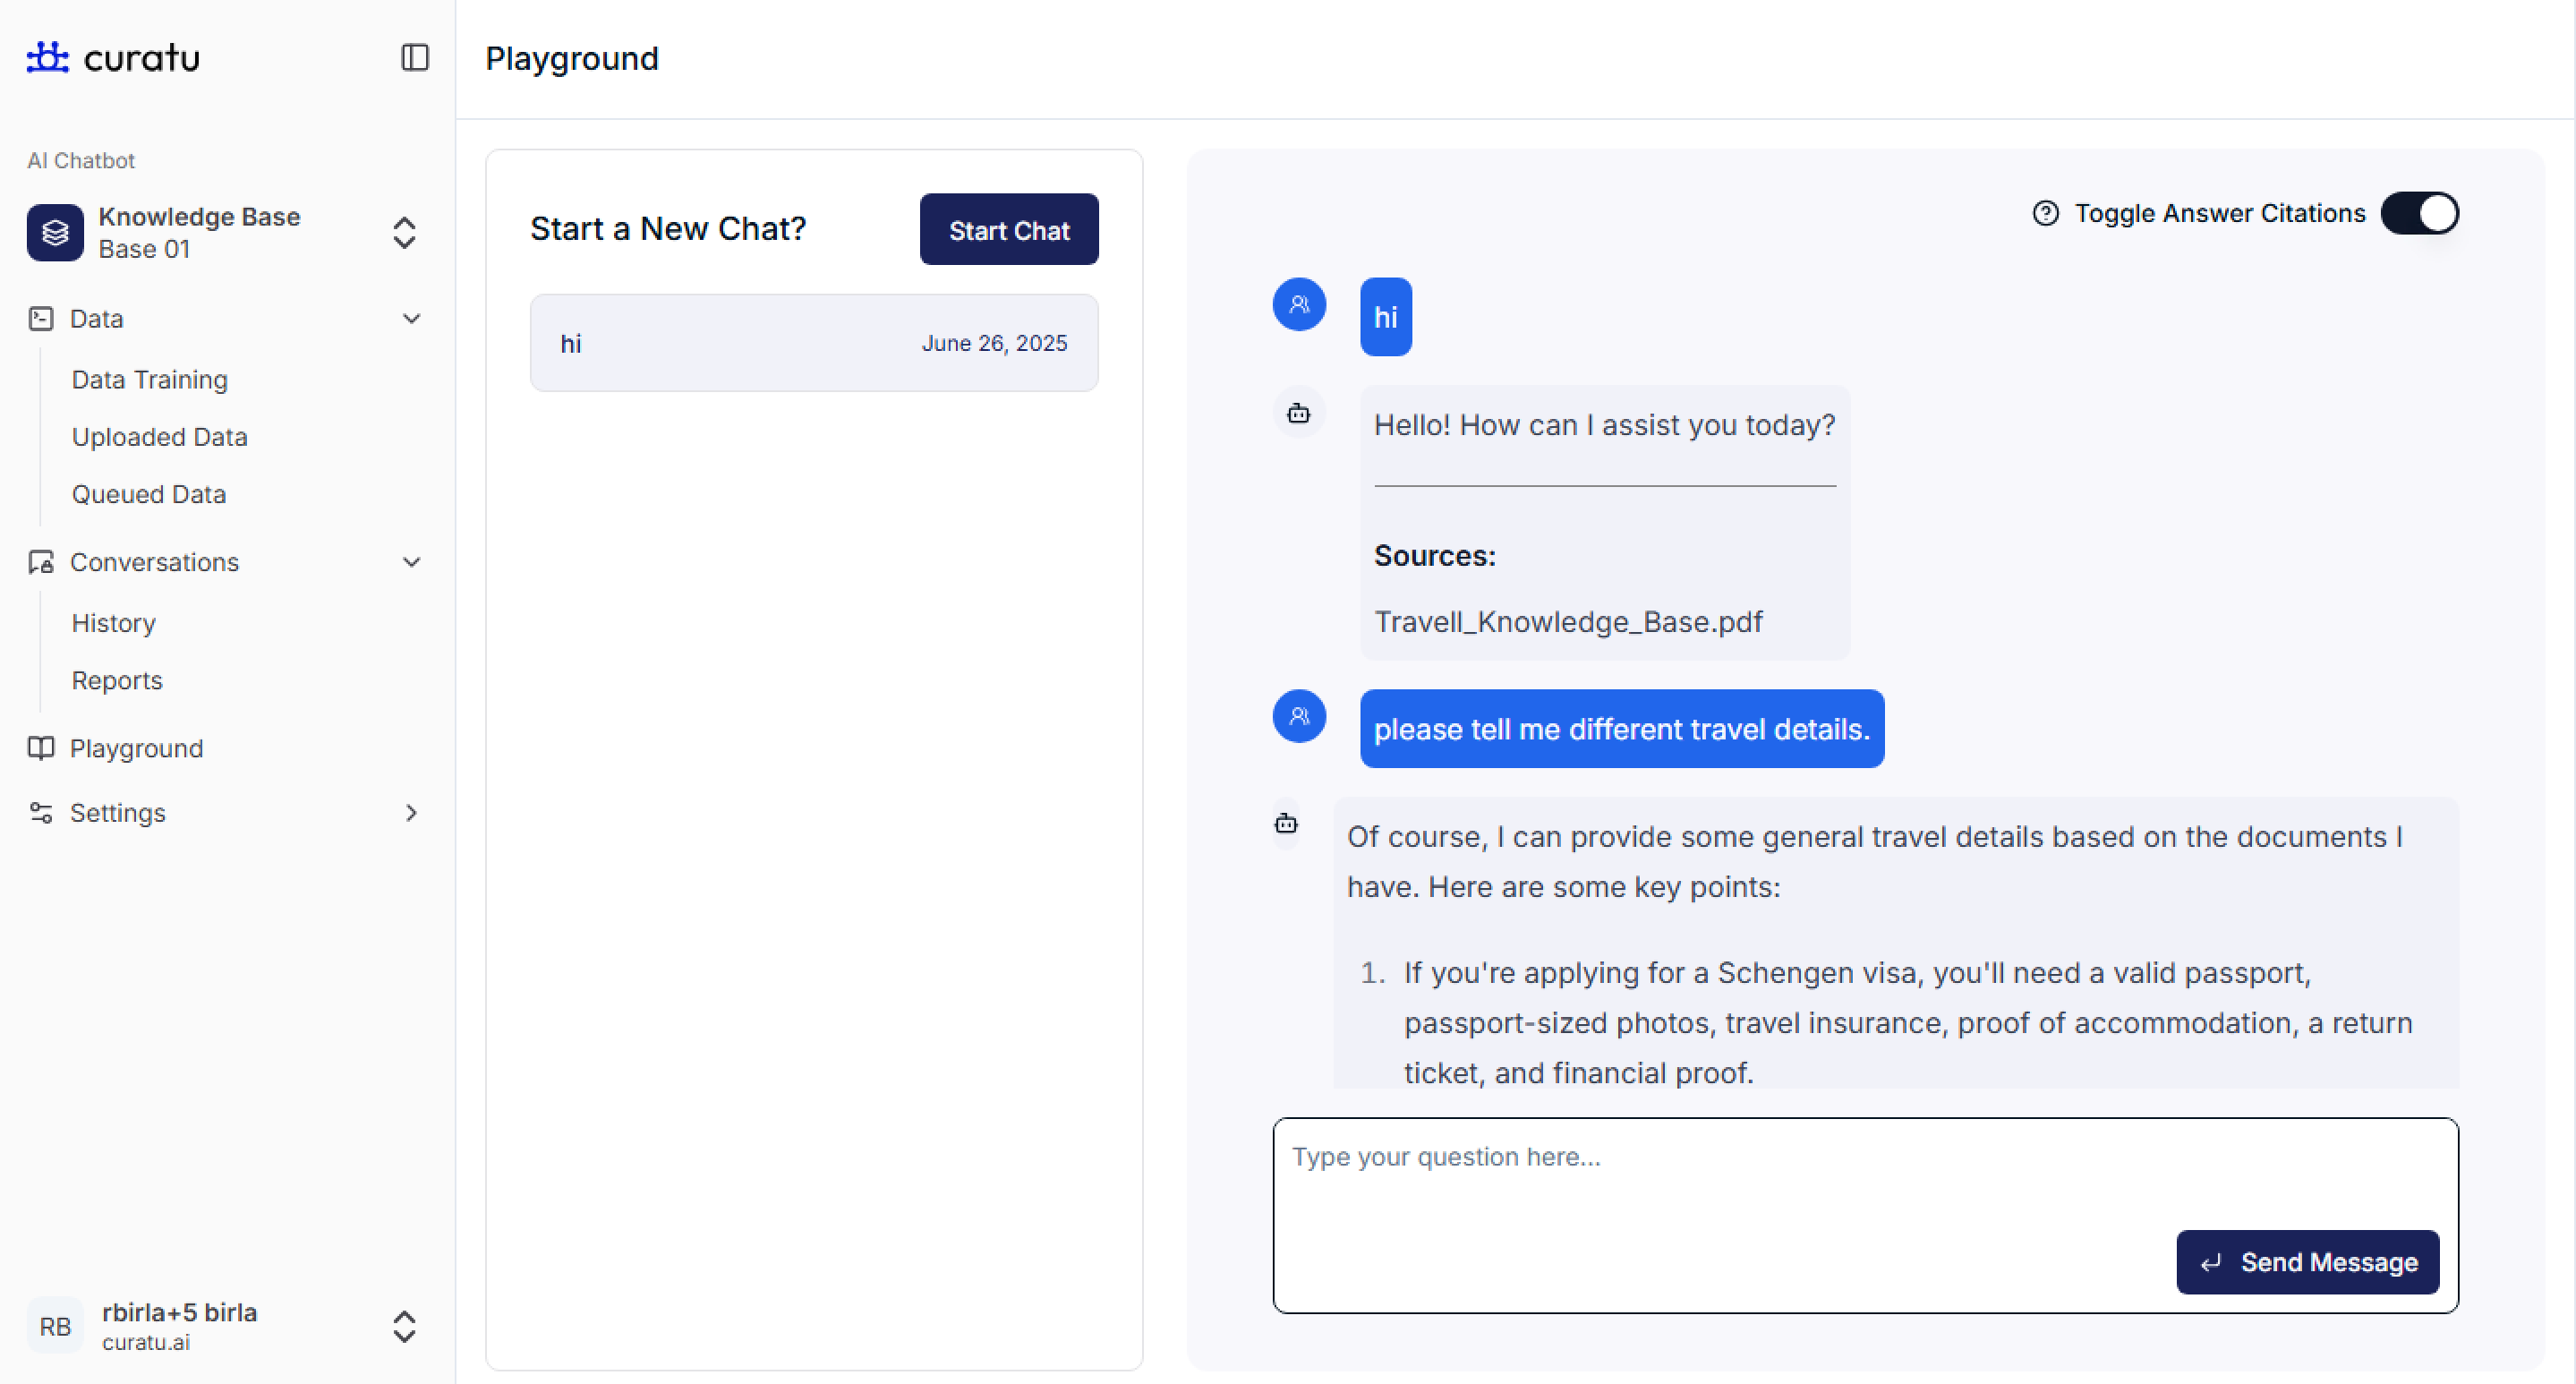
Step 6: Test in Playground
- Click on
Playgroundin the left menu (under Conversations) - Click on Start Chat
- Type a message like
Hiand the bot should reply with your configured message:Hello! How can I help you? - You can then ask travel-related questions (e.g., “How to apply for a visa?”)
- The chatbot will reply using data from the uploaded knowledge base file
The Playground is meant for testing how the chatbot responds after training.
Notes (For Super Admin Only)
- Only Super Admins can create, configure, and train a knowledge base
- You can upload multiple files or use URLs/regex for data training if needed
- All changes can be managed under:
Settings → Knowledge Base
Final Result
Your Travel Knowledge Base is now live, trained, and ready to respond to travel-related queries in the Playground. You’ve successfully completed setup and testing!