Settings
The Settings section allows you to configure and manage your knowledge base, user access, chatbot embedding, and branding. Below is a detailed explanation of each tab inside Settings:
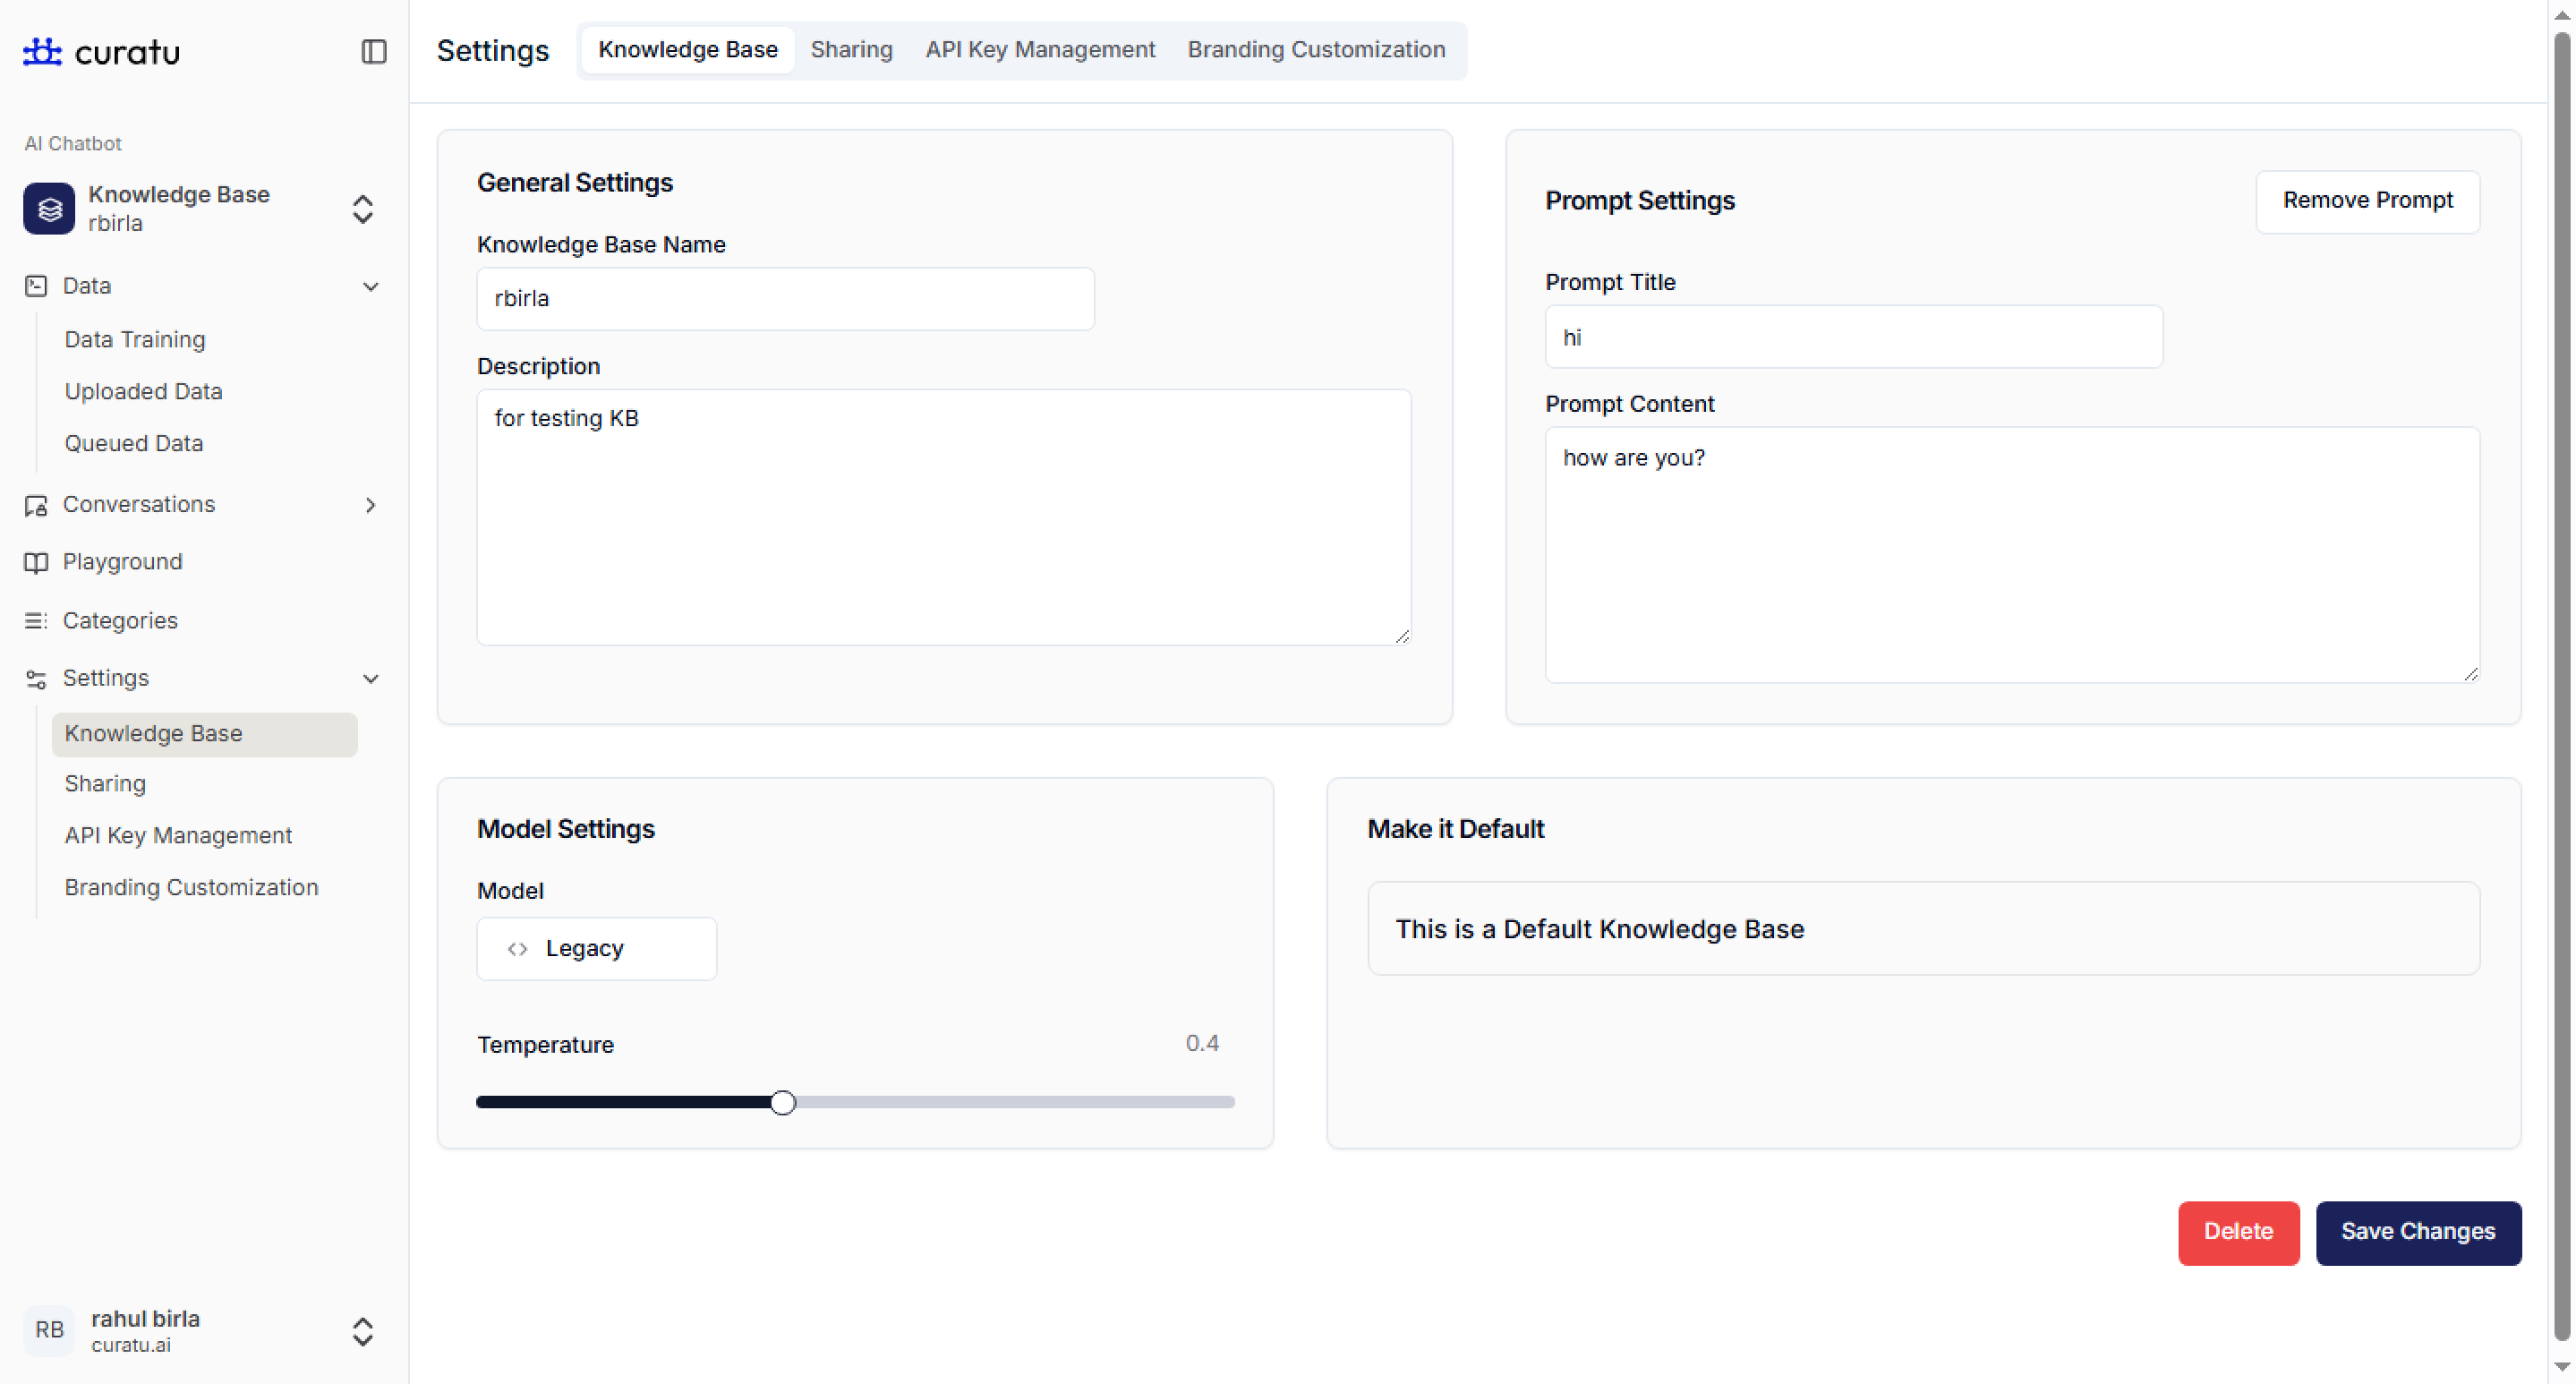
Knowledge Base Tab
This tab allows you to update the core information and behavior of the knowledge base that you’ve already created.
You can see all details here
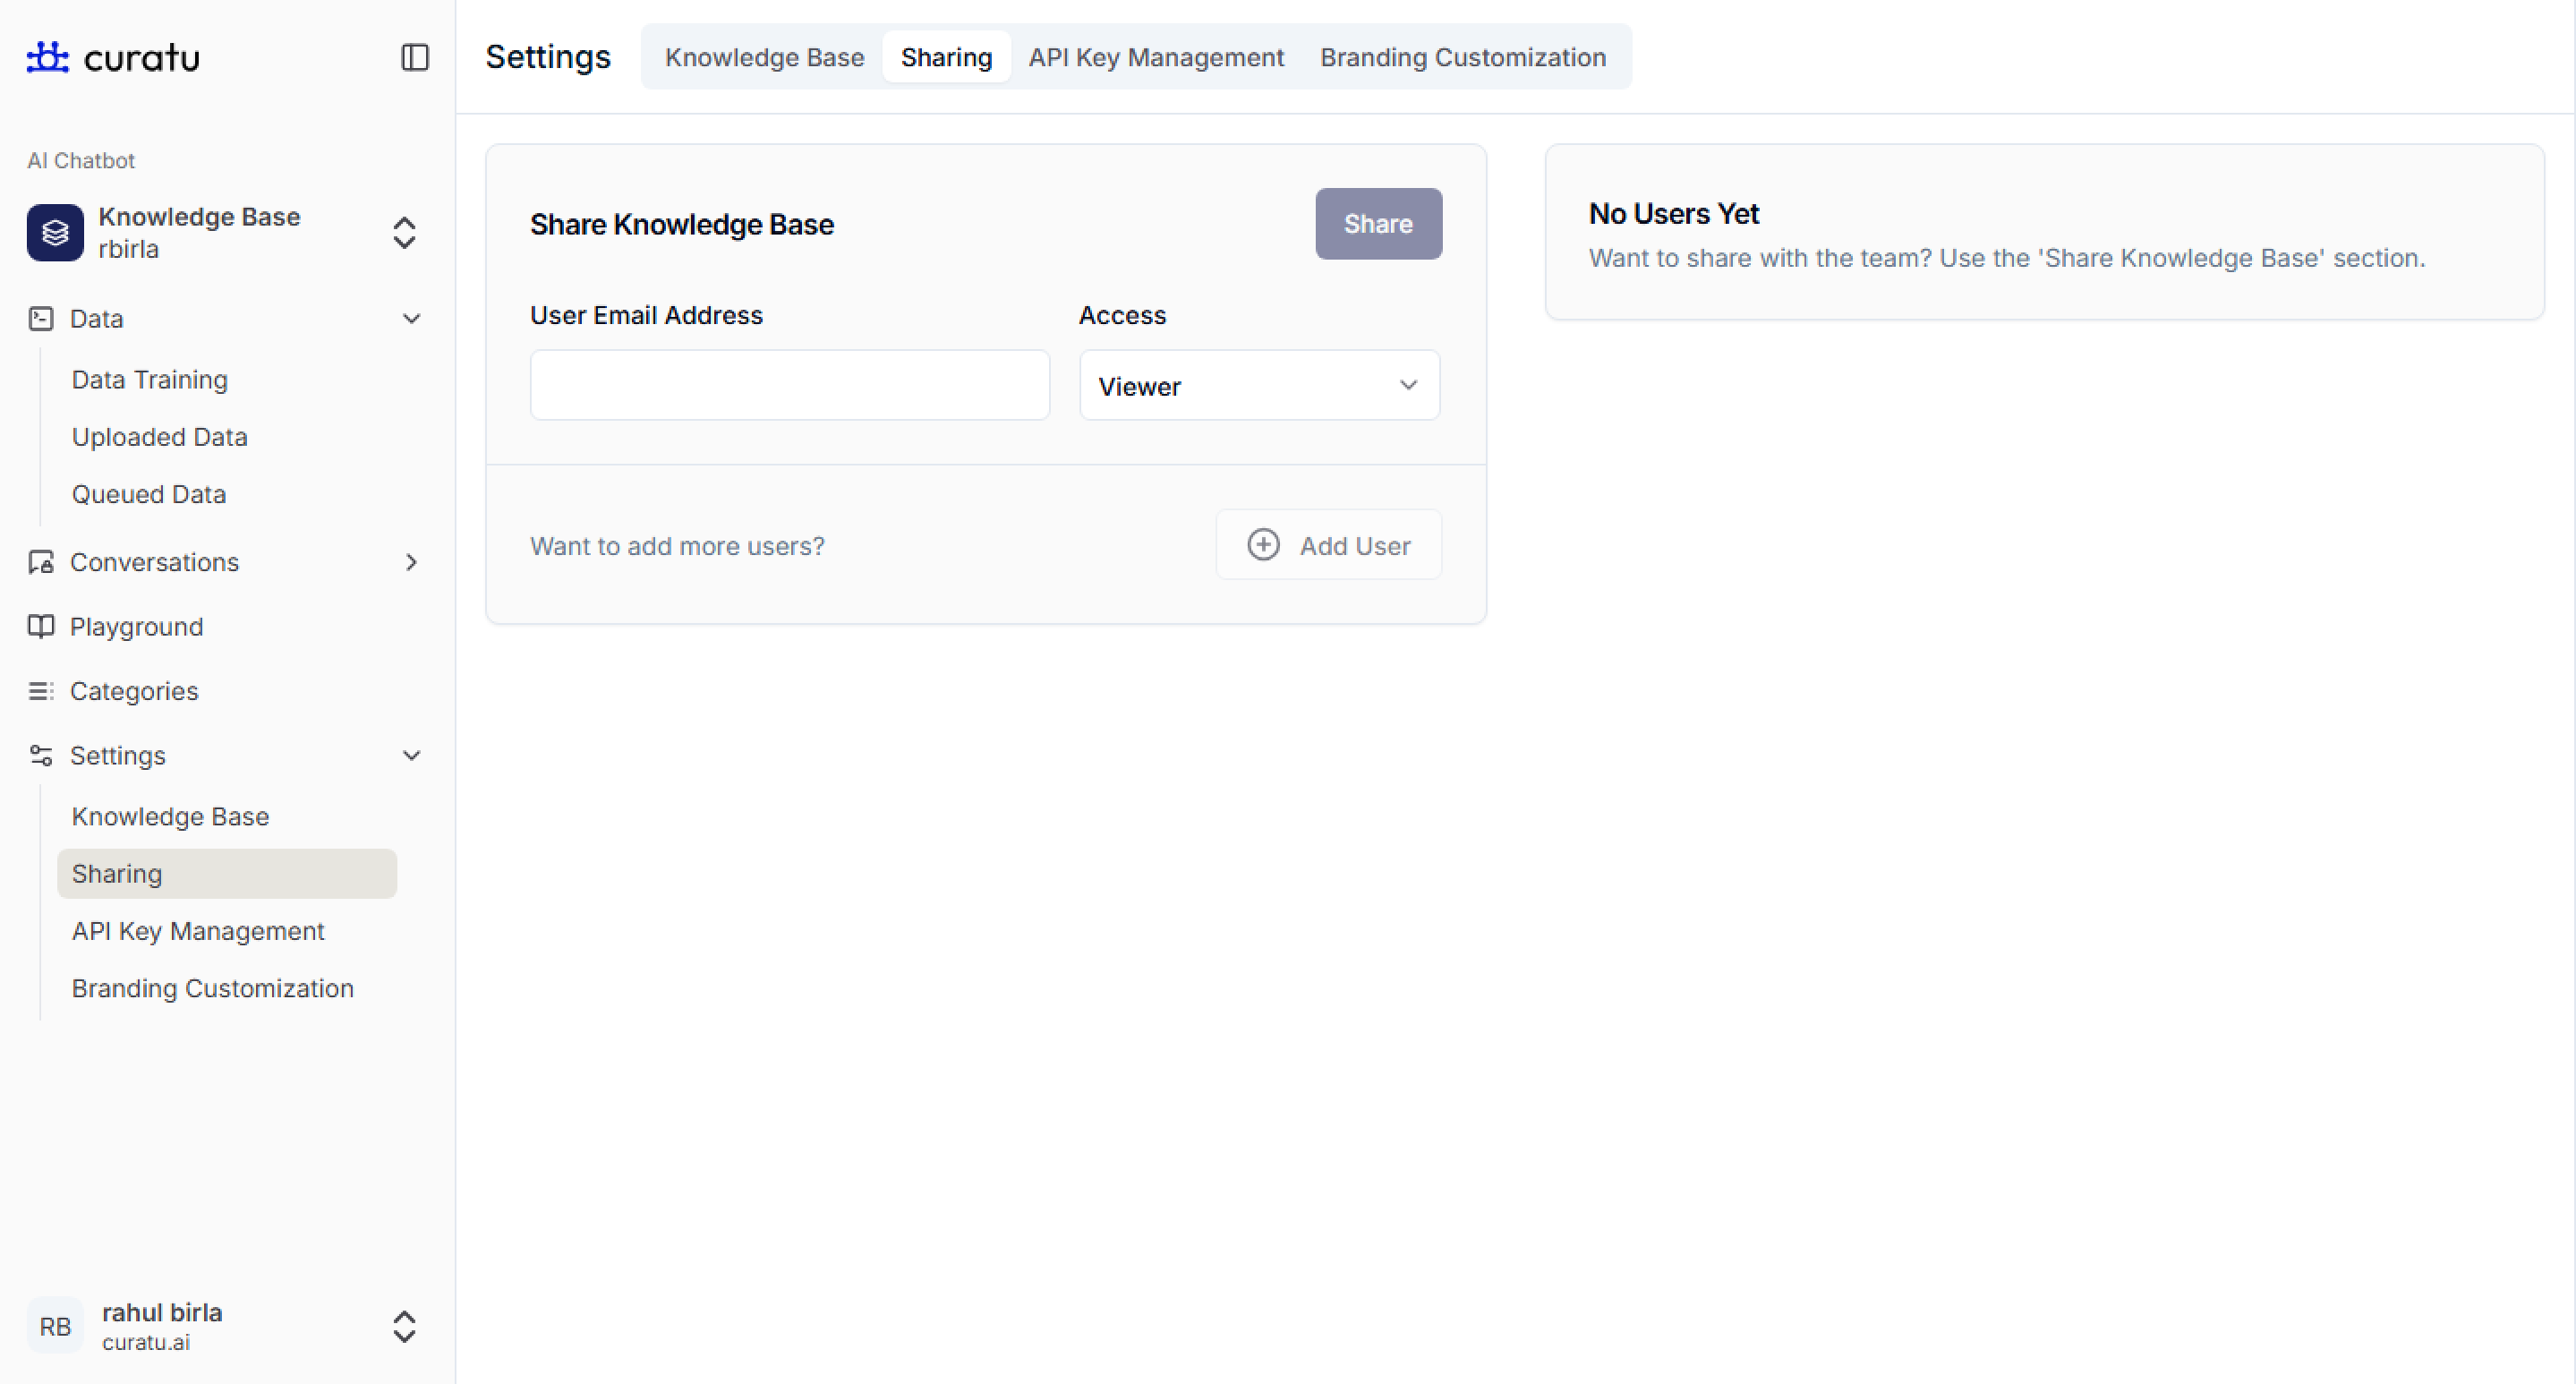
Sharing Tab
Use this tab to control who can access or manage your knowledge base.
- User Email Address: Enter the email of the person you want to share access with.
- Access Roles:
- Viewer: Can ask questions in Playground
- Editor: Can view and add data but not delete
- Owner: Full control – add, edit, delete KB content
Example:
- Add
john@company.comas an Editor so he can contribute content, but not delete the KB.

API Key Management
This tab allows you to generate API keys to integrate your knowledge base into external websites.
Create New API Key
- Key Name: A name to identify this key. Eg:
test-key - Domain Name: The domain where the chatbot will be embedded. Eg:
https://support.curatu.ai
Click Generate to create the key.
Generated API Keys Table
- Name: Name of the key
- Domain: Linked website
- API Key: Masked key for security
- Created By & Date: Who and when it was created
- Actions: Copy, View, or Delete keys

Branding Customization
The Branding Customization tab allows you to personalize the look and feel of the chatbot and emails it sends. This helps align the chatbot interface and communications with your company’s brand identity.
Chatbot Navigation and Color Schema
Customize the visual appearance of your chatbot widget.
-
Chatbot Title:
Set the chatbot’s name as it will appear in the header.
Eg:TravelBot,Support Assistant -
Primary Color & Secondary Color:
Define the color scheme of the chatbot using hex codes.
Eg:#0052ccfor Primary and#edf2f7for Secondary -
Chatbot Logo Path:
Provide the image path or URL for the chatbot logo that will appear in the interface.
Eg:/images/chatbot-logo.png
Chatbot Greeting Message and Terms
Configure what users see when the chatbot greets them and add your legal message.
-
Greeting Message:
This is the first message users will see when the chatbot starts.
Eg:Hi there! How can I assist you today? -
Terms and Conditions:
Add a short disclaimer.
Eg:By continuing, you agree to our Privacy Policy and Terms.
Email Body and Footer Content
Customize the content of chatbot-generated emails.
-
Email Body Title:
This will appear at the top of the email body.
Eg:Here’s the chat transcript from your recent support session. -
Email Footer Content:
Add a branded message or legal note to appear in the email footer.
Eg:This message was sent from Curatu Support. Please do not reply to this email.
Email Transcript Customizations
Control how chat transcripts are emailed to users.
-
Email Subject Line:
Set the subject of the email.
Eg:Your Curatu Chat Transcript -
Email Logo Path:
Insert a logo into the email (path or hosted image URL).
Eg:/images/email-logo.png -
Sender Preview Name:
The name that appears as the sender of the email.
Eg:Curatu Support Team -
Sender Email Address:
Define the part before the domain for the sender email.
Eg:supportforsupport@curatu.ai

Once all fields are filled, click Save Changes to apply your branding.